Have you ever tackled a plumbing project and felt overwhelmed by the complexity of traditional piping methods? Well, fret no more! Plug piping offers a simpler, faster, and more cost-effective alternative, making it ideal for both DIY enthusiasts and professionals.
This guide will equip you with the expert tips you need to master plug piping and complete your next project with confidence.
What is Plug Piping?
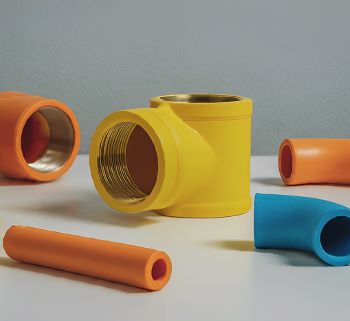
Plug piping is also known as solvent cement piping. It is a type of prefabricated piping system that uses pre-made fittings and solvent cement to connect pipes. Unlike traditional piping methods, which involve threading, welding, or soldering, plug piping is simpler, faster, and cheaper.
The Plug Piping Components
Before we install them, let’s look at the basic parts of plug piping:
A. Types of plug fittings:
➡️ Elbows: These fittings change the direction of the piping run, typically at 90-degree angles.
➡️ Tees: They create branch lines, allowing you to connect three pipes at a single point.
➡️ Couplings: These fittings simply connect two straight pipe sections.
➡️ Reducers: They facilitate connections between pipes of different diameters, ensuring a smooth transition.
B. Pipe materials:
The most common materials used in plug piping include:
➡️ PVC (Polyvinyl Chloride): Affordable and versatile, suitable for cold water applications.
➡️ CPVC (Chlorinated Polyvinyl Chloride): Offers higher temperature resistance compared to standard PVC, making it ideal for hot water lines.
➡️ PEX (Cross-linked Polyethylene): Flexible and easy to work with, often used for concealed or confined space applications.
C. Tools and equipment:
Gather these essential tools before your plug piping project:
➡️ Pipe cutters: Ensure clean and square cuts for a proper fit.
➡️ Deburring tool: Removes any burrs or imperfections left after cutting, creating a smooth edge for easy insertion into fittings.
➡️ Joint compound: Creates a watertight seal between the pipe and fitting.
Expert Tips for Plug Piping Installation
Now, let’s get down to business! Here are some expert recommendations to help you with the installation process:
A. Planning and preparation:
➡️ Measure twice, cut once: Measure the pipe lengths accurately to avoid unnecessary cuts and wastage.
➡️ Choose the right fittings: Select fittings that match your pipe diameter and desired connection points.
➡️ Gather your tools and materials: Ensure you have everything you need before starting the installation.
B. Cutting and deburring pipes:
➡️ Use a sharp pipe cutter to make clean, square cuts.
➡️ Utilize a deburring tool to remove any burrs or raised edges from the cut pipe end.
C. Applying joint compound:
➡️ Apply a thin and even layer of joint compound around the entire pipe end.
➡️ Avoid over-applying, as excess compounds can restrict flow and hinder proper connection.
D. Assembling the system:
➡️ Insert the prepared pipe end firmly into the fitting socket, ensuring a snug fit.
➡️ Hand-tighten the nut of the fitting following the manufacturer’s instructions.
➡️ Over-tightening might harm the fitting or pipe.
E. Pressure testing:
➡️ Once the system is assembled, perform a pressure test to identify any leaks.
➡️ Consult the manufacturer’s recommendations. They have the right testing pressure for your piping system.
Additional Tips and Considerations
A. Safety precautions:
➡️ Always wear safety glasses when working with piping materials to protect your eyes from flying debris.
➡️ Be mindful of sharp edges and wear gloves to avoid cuts.
B. Advanced techniques:
➡️ For complex projects, use pipe supports. They ensure the weight is spread well and prevent sagging.
➡️ Specialized tools like crimpers might be needed for certain types of fittings. If you’re unsure, ask a specialist for advice.
C. Troubleshooting common issues:
➡️ Leaks: If you encounter leaks, check for loose connections, reapply joint compound, or consult a professional for more complex repairs.
➡️ Loose connections: Ensure all fittings are properly tightened following the manufacturer’s instructions.
➡️ Compatibility issues: Double-check that the chosen pipe material and fittings are compatible for your intended application.
Conclusion
Follow these expert tips. Use the right tools and materials. Then, you can conquer your next plug piping project with confidence.
Remember, plug piping offers a straightforward and cost-effective solution for various plumbing applications. For more learning, try online tutorials and manufacturer guides. Or, consult a professional plumber for complex projects.
Post time: Apr-24-2024


