
Keeping your hydraulic system running smoothly requires maintaining its parts. Hydraulic quick couplers are no exception. These couplers allow fast and easy connection and disconnection of hydraulic lines.
But, their function depends heavily on a small but crucial part – the O-ring. A worn-out O-ring can lead to leaks and pressure loss, hindering your entire system’s performance.
Luckily, replacing a hydraulic quick coupler O-ring is simple. You can do it yourself with the right knowledge and prep.
Before You Begin: Safety and Preparation
Before starting the replacement, safety is most important. This is true when working with hydraulic systems. Here’s what you’ll need to get started safely and effectively:
➡️ Safety First:
Hydraulic systems operate under high pressure. Always depressurize the system completely before attempting any repairs. Refer to your equipment’s manual for specific instructions on safe pressure release. Wear safety glasses to protect your eyes from any potential fluid splashes.
➡️ Gather Your Tools:
Assemble the necessary tools for the job. You’ll need clean rags and a pick tool with a blunt tip to avoid scratches. Also, you’ll need a replacement O-ring designed for your coupler type and a compatible lubricant. Check your hydraulic fluid manual for recommendations.
➡️ Identify Your Coupler:
Different hydraulic quick coupler manufacturers have slight variations in design. Knowing your specific coupler type is crucial. Consult your equipment manual or search online for pictures and diagrams to identify your coupler. This will help you locate the O-ring and ensure you obtain the correct replacement.
➡️ Find the Right O-Ring:
Not all O-rings are created equal. Ensure you get a replacement O-ring that matches the size and material of the original one. The size will be specific to your coupler model, and the material should be compatible with the type of hydraulic fluid used in your system.
Step-by-Step O-Ring Replacement Guide
Now that you’re prepped and ready, let’s walk through the O-ring replacement process:
1. Depressurize the Hydraulic System:
Follow the manufacturer’s instructions for safely releasing pressure from the system. Double-check for any residual pressure before proceeding. You can often achieve this by actuating the coupler several times after depressurization.
2. Disconnecting the Coupler Halves:
Refer to your specific coupler’s manual for proper disassembly instructions. There might be a locking mechanism or specific sequence for separating the halves. Use proper techniques to avoid damaging the coupler during this process.
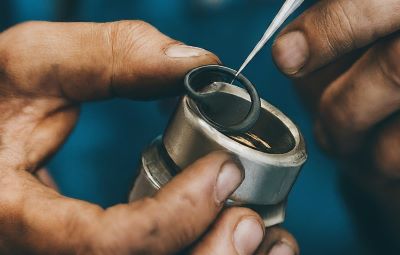
3. Removing the Worn O-Ring:
Carefully use your pick tool to remove the worn O-ring from its groove. Be mindful not to scratch the sealing surface of the coupler. Once the O-ring is removed, take a moment to clean any debris or dirt from the groove using a clean rag.
4. Preparing the New O-Ring:
Inspect the new O-ring thoroughly for any defects or imperfections. Apply a light coat of lubricant compatible with your hydraulic fluid onto the O-ring.
5. Installing the New O-Ring:
Carefully position the new O-ring within the groove, ensuring it sits flush and properly aligned. Gently press the O-ring into place using your finger or pick tool.
6. Reassembly and Leak Check:
Reconnect the coupler halves according to the manufacturer’s instructions. Tighten the connections securely, following the recommended torque specifications for your coupler type. Once reassembled, pressurize the system and visually inspect for leaks.
You can also use soapy water around the connection points. If bubbles appear, it indicates a leak, and you’ll need to repeat the process and ensure a proper seal.
Additional Tips and Considerations
➡️ Replacement Frequency:
The frequency of O-ring replacement depends on usage and the manufacturer’s recommendations. Usually, you should inspect and replace your equipment regularly. The timing should be based on your specific conditions.
➡️ O-Ring Storage:
Store replacement O-rings in a cool, dry place away from direct sunlight to maintain their elasticity.
➡️ Used O-Ring Disposal:
Dispose of used O-rings responsibly according to local regulations. Some hydraulic fluids and materials may require special disposal procedures.
Conclusion
Replacing a hydraulic quick coupler O-ring is easy. It can save you time and money by avoiding downtime and the need for pro repairs in most cases. However, if you face any complexities or have concerns about hydraulic systems, don’t hesitate to consult a technician for help.
Remember, safety is always the top priority!
Post time: Jun-18-2024