The world of hydraulics runs on precision and control. A network of tubes, fluids, and fittings work together. They transfer power and operate machinery in many industries. Among these essential components are hydraulic bullhead tees, playing a crucial role in directing fluid flow within a system.
This blog post dives deep into mastering hydraulic bullhead tees. It will give you the knowledge and techniques for choosing, installing, and maintaining them.
Understanding Hydraulic Bullhead Tees
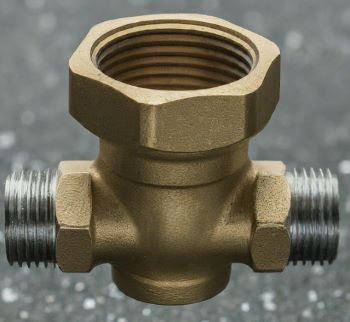
Hydraulic bullhead tees are a distinct type of fitting featuring a three-way branching design. Unlike regular tees, the bullhead tee boasts a larger diameter port on the main run, while the two branch ports have a smaller diameter. This setup is unique. It allows for flow from the main line to the branches without restrictions. This flow minimizes pressure drops.
Bullhead tees are made of common materials. These include strong steel, brass, and stainless steel. These materials let them handle the high pressures of hydraulic systems.
Applications for hydraulic bullhead tees are diverse, found in various hydraulic system configurations. They are commonly used for:
➡️ Splitting fluid flow: Directing pressurized fluid to two separate actuators or lines.
➡️ Connecting pressure gauges: Providing an access point for monitoring system pressure.
➡️ Creating complex branching layouts: Used in conjunction with other fittings to achieve intricate fluid flow paths.
Installation Tips for Hydraulic Bullhead Tees
Installing a hydraulic bullhead tee requires close attention. This is needed to ensure a leak-proof and secure connection. Here’s a step-by-step guide for proper installation:
1. Selection:
Choose the right tee based on your system’s pressure rating, port size (including the larger main port), and thread type. Opt for a pressure rating exceeding your system’s maximum operating pressure for added safety.
2. Surface Preparation:
Clean and deburr the connection points on the tee and the mating components. Remove any dirt, debris, or sharp edges that could compromise the seal.
3. Thread Sealant:
Apply a thin coat of thread sealant compatible with your hydraulic fluid to the male threads of the tee. Ensure even coverage to create a watertight barrier.
4. Tightening:
Use appropriate wrenches to hand-tighten the tee into the desired location. Avoid over-tightening, which can damage the threads or fitting. Refer to the manufacturer’s recommendations for specific torque specifications.
5. Manufacturer’s Instructions:
Consult the manufacturer’s installation guide for instructions on the chosen bullhead tee model. Following these guidelines ensures proper installation and optimal performance.
Common Mistakes to Avoid with Hydraulic Bullhead Tees
Even the most seasoned mechanics can make mistakes. Here are some common pitfalls to avoid during bullhead tee installation:
➡️ Pressure Rating Mismatch:
Using a tee with a pressure rating lower than your system’s operating pressure can lead to catastrophic failure.
➡️ Improper Thread Sealing:
Incorrect thread sealant can cause leaks, decreasing system efficiency. It may also lead to damage.
➡️ Over-tightening or Cross-threading:
Applying excessive force or misaligning the threads can damage the fitting and lead to leaks.
➡️ Incompatible Thread Types or Port Sizes:
Ensure the tee’s thread type and port sizes match the mating components to create a secure and leak-proof connection.
Safety is paramount when working with hydraulic systems. Always wear the right PPE. This includes safety glasses, gloves, and proper clothing. If unsure about any step during installation, consult a qualified hydraulic technician.
Check out these other resources for a deeper knowledge on hydraulic fittings ↙️↙️↙️
Hydraulic Hex Plugs: What You Should Know
Navigating Hydraulic Cross Fittings Like A Pro
Exploring Bulkhead Plumbing Fittings: A Complete Overview
Advanced Techniques for Hydraulic Bullhead Tees
For experienced users, hydraulic bullhead tees offer opportunities for more complex configurations:
➡️ Double-Teeing:
Connecting two bullhead tees enables complex branching layouts. This is perfect for systems that need to distribute fluids to multiple points.
➡️ Pressure Gauge Installation:
A bullhead tee creates a port for a pressure gauge installation. This allows easy system pressure monitoring.
➡️ Flushing Procedures:
After installation, flush the system with clean hydraulic fluid to remove contaminants. This helps eliminate any introduced during installation.
For complex installations, remember to seek guidance from a qualified hydraulic technician. It is highly recommended. Their expertise ensures optimal system performance and safety.
Maintenance Tips for Hydraulic Bullhead Tees
Regular maintenance is vital for maximizing the lifespan of your hydraulic bullhead tees. Here are some essential guidelines to remember:
➡️ Inspection: Regularly inspect the tees for signs of leaks, cracks, or excessive wear. Early detection of any issues allows for prompt repairs and prevents potential system failures.
➡️ Tightening Connections: Over time, connections may loosen due to vibration or thermal expansion. Periodically check and retighten any loose connections, following the manufacturer’s torque recommendation.
➡️ Replacement: Don’t neglect worn-out or damaged tees. Replacing them with high-quality hydraulic bullhead tees has two benefits. It ensures system integrity and prevents costly downtime.
Conclusion
Mastering hydraulic bullhead tees empowers you to maintain efficient and reliable hydraulic systems. You can guarantee peak performance and stay away from expensive maintenance. To do this, understand their unique design, follow proper installation, and do regular maintenance.
Remember, this guide serves as a valuable resource for future bullhead tee applications. However, for complex installations or technical questions, consult a qualified hydraulic professional. Their expertise can make all the difference in achieving a safe and high-performing hydraulic system.
Post time: May-03-2024


