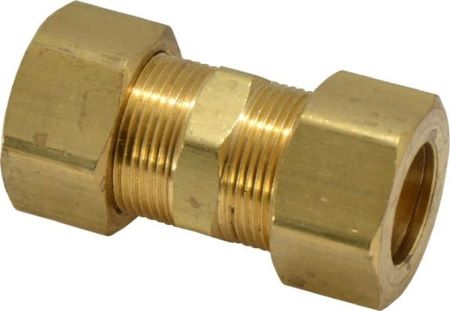
Plumbing leaks are a homeowner’s nightmare. They can cause property damage, increase water bills, and create health hazards. While there are various methods to join copper pipes, copper compression fittings stand out as a reliable and efficient solution for achieving leak-free seals.
Why Copper Compression Fittings Are Essential for Leak-Free Seals
Leaks in plumbing systems can lead to a host of problems, including water damage to walls, ceilings, and floors, mold growth, and increased water bills. Leaks may, in extreme circumstances, even result in structural damage. To prevent these issues, it’s crucial to use high-quality fittings that provide a secure and durable seal. Copper compression fittings are designed to do just that.
Copper Compression Fittings: What They Are and How They Work
Copper compression fittings are a type of plumbing connector used to join copper pipes together. They consist of three main parts: the nut, the ferrule, and the body. The nut is the threaded part that is tightened to create the seal. The ferrule is a metal ring that compresses the pipe when the nut is tightened. The body is the fitting itself, which connects to the pipes.
When assembled correctly, the compression fitting creates a watertight seal through a combination of factors. The ferrule compresses the pipe, creating a tight fit. The nut applies pressure to the ferrule, ensuring a secure connection. Copper’s inherent strength and durability contribute to the overall reliability of the fitting.
Step-by-Step Guide to Installing Copper Compression Fittings
Installing copper compression fittings is relatively straightforward, but it’s essential to follow the correct steps for optimal results.
Preparing Your Pipes and Fittings
➡️ Cut the copper pipe to the desired length using a pipe cutter.
➡️ Deburr the cut end of the pipe to remove any sharp edges.
➡️ Choose the appropriate size compression fitting for your pipe.
Properly Assembling the Fitting
➡️ Slide the ferrule onto the pipe.
➡️ Insert the pipe into the body of the fitting.
➡️ Hand-tighten the nut onto the fitting.
➡️ Use a pipe wrench to tighten the nut securely, but avoid overtightening.
Testing for Leaks: Ensuring a Watertight Seal
Once the fitting is installed, it’s crucial to test for leaks. Turn on the water supply and carefully inspect the connection for any signs of water seepage. If you find a leak, tighten the nut slightly, but be cautious not to overtighten.
Troubleshooting Common Issues with Copper Compression Fittings
Despite their reliability, copper compression fittings can sometimes experience issues. Common problems include loose fittings, misaligned pipes, and wear and tear.
➡️ Loose fittings: If a fitting is loose, it can cause leaks. Tighten the nut carefully, but avoid overtightening, as this can damage the fitting.
➡️ Misaligned pipes: Misaligned pipes can prevent the ferrule from making a proper seal. Carefully disassemble the fitting, realign the pipes, and reassemble.
➡️ When to Replace Your Fittings: Over time, copper compression fittings can show signs of wear and tear, such as corrosion or damage to the ferrule. If you notice significant damage, it’s best to replace the fitting to prevent leaks.
Maintenance Tips for Long-Lasting Copper Compression Fittings
To ensure the longevity of your copper compression fittings, regular inspection and maintenance are essential. Check fittings for leaks or signs of damage periodically. Cleaning the fittings with a mild detergent can help prevent corrosion. Using high-quality fittings and following proper installation techniques will also contribute to their durability.
Conclusion: Achieving Leak-Free Plumbing with Copper Compression Fittings
You may greatly lower the chance of plumbing leaks by being aware of the advantages of copper compression fittings, adhering to installation guidelines, and performing routine maintenance.
Investing in quality fittings and taking the time to install them correctly will pay off in the long run with a leak-free and efficient plumbing system.
Post time: Aug-23-2024


